Tuesday, December 1, 2009

Install Windows 7 from USB

Requirements:

*USB Flash Drive (Minimum 4GB)

*Windows 7 or Vista installation files.

Follow the below steps to create bootable Windows 7/Vista USB drive using which you can install Windows 7/Vista easily.

1. Plug-in your USB flash drive to USB port and move all the contents from USB drive to a safe location on your system.

2. Open Command Prompt with admin rights. Use any of the below methods to open Command Prompt with admin rights.

*Type cmd in Start menu search box and hit Ctrl+ Shift+ Enter.

Or

*Go to Start menu > All programs > Accessories, right click on Command Prompt and select Run as administrator.

3. You need to know about the USB drive a little bit. Type in the following commands in the command prompt:

First type DISKPART and hit enter to see the below message.

Bootable USB Drive

Next type LIST DISK command and note down the Disk number (ex: Disk 1) of your USB flash drive. In the below screenshot my Flash Drive Disk no is Disk 1.

4. Next type all the below commands one by one. Here I assume that your disk drive no is “Disk 1”.If you have Disk 2 as your USB flash drive then use Disk 2.Refer the above step to confirm it.

So below are the commands you need to type and execute one by one:

SELECT DISK 1

CLEAN

CREATE PARTITION PRIMARY

SELECT PARTITION 1

ACTIVE

FORMAT FS=NTFS

(Format process may take few seconds)

ASSIGN

EXIT

Don’t close the command prompt as we need to execute one more command at the next step. Just minimize it.

Bootable USB Drive

5. Next insert your Windows7/Vista DVD into the optical drive and check the drive letter of the DVD drive. In this guide I will assume that your DVD drive letter is “D” and USB drive letter is “H” (open my computer to know about it).

6. Maximize the minimized Command Prompt in the 4th step.Type the following command now:

D:CD BOOT and hit enter.Where “D” is your DVD drive letter.

CD BOOT and hit enter to see the below message.

7. Type another command given below to update the USB drive with BOOTMGR compatible code.

BOOTSECT.EXE/NT60 H:

14

Where “H” is your USB drive letter. Once you enter the above command you will see the below message.

8. Copy your Windows 7/Vista DVD contents to the USB flash drive.

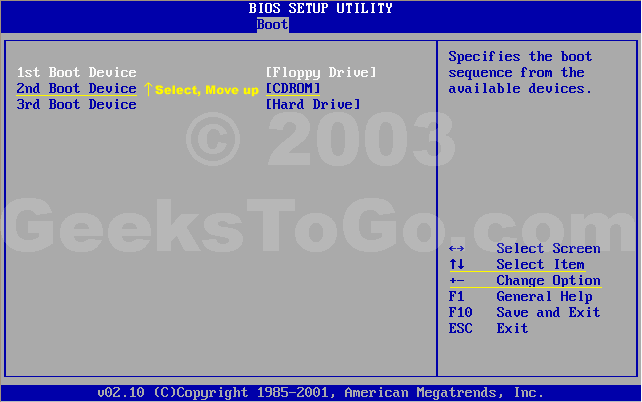
9. Your USB drive is ready to boot and install Windows 7/Vista. Only thing you need to change the boot priority at the BIOS to USB from the HDD or CD ROM drive. I won’t explain it as it’s just the matter the changing the boot priority or enabling the USB boot option in the BIOS.

Note: If you are not able to boot after following this guide means you haven’t set the BIOS priority to USB. If you got any problem in following this guide feel free to ask questions by leaving comment.

Monday, September 28, 2009

Printers that use ports that do not begin with COM, LPT, or USB are not redirected in a remote desktop or a terminal services session

Important This section, method, or task contains steps that tell you how to modify the registry. However, serious problems might occur if you modify the registry incorrectly. Therefore, make sure that you follow these steps carefully. For added protection, back up the registry before you modify it. Then, you can restore the registry if a problem occurs. For more information about how to back up and restore the registry, click the following article number to view the article in the Microsoft Knowledge Base:
322756 (http://support.microsoft.com/kb/322756/ ) How to back up and restore the registry in Windows
To fix this problem on a computer that is not running Windows Server 2003 as a Terminal Server, force all ports (including DOT4) on the client computer to be filtered for redirection. To do this, add a DWORD value named FilterQueueType to HKEY_CURRENT_USER\Software\Microsoft\Terminal Server Client\Default\AddIns\RDPDR and set its value data to FFFFFFFF.

Follow these steps:
  1. Click Start, click Run, type regedit, and then click OK.
  2. Locate and then click the following key in the registry:
    HKEY_CURRENT_USER\Software\Microsoft\Terminal Server Client\Default\AddIns\RDPDR
  3. On the Edit menu, point to New, and then click DWORD Value.
  4. Type FilterQueueType, and then press ENTER.
  5. On the Edit menu, click Modify.
  6. Type FFFFFFFF, and then click OK.
  7. Close the Registry Editor.
  8. Restart your computer.
This enables all ports on the client to be redirected.

To work around this problem on a client computer that has a multifunction print device, change the port that the multifunction print device uses from DOT4 to an LPT port.

For example, to configure a multifunction print device to use an LPT port on a Windows XP-based computer, follow these steps:
  1. InControl Panel, openPrinters and Faxes.
  2. Right-click the local printer that is not redirected, and then click Properties.
  3. Click the Ports tab, click an LPT port, and then click Apply.

    The printer should now appear next to that port.
  4. Close the Printer Properties window, and then reconnect by using Remote Desktop.
Important When a multifunction printer is using a standard LPT port instead of the DOT4 port, it loses its multifunction capabilities, such as scanning, faxing, or copying. To regain the multifunction capabilities, the print device must use the DOT4 port.

How to prevent Backup Exec from failing a backup operation when encountering corrupt files

How to prevent Backup Exec from failing a backup operation when encountering corrupt files (excluding Microsoft Exchange files)

Exact Error Message
WARNING: "" is a corrupt file.
This file cannot verify.


Details:
When Backup Exec (tm) encounters a corrupt file, the job will fail by default. The detail message in the Backup Exec job log is following:

Exact Error Message
The backup of the item is bad
Warning: %Email message% is a corrupt file. The file cannot verify
Unable to backup the attachment data associated with one or more messages. Some messages and their attachments may have been deleted while the backup was already in progress.

Details:
Final Error Code: a000fe2d HEX (0xa000fe2d HEX) or e000fe2d HEX (0xe000fe2d HEX)
Final Error Description: "The backup of the item is bad"
Final Error Category: Resource Errors
Error Text In Job Log: "Warning: %Email message% is a corrupt file. The file cannot verify" or "Unable to backup the attachment data associated with one or more messages. Some messages and their attachments may have been deleted while the backup was already in progress."

By adding or modifying the registry key mentioned below, Backup Exec can be configured not to fail the job when a corrupt file is encountered. Please note, this solution is not intended for use with Microsoft Exchange files such as .EDB, .STM and .LOG files. Corrupt Microsoft Exchange files may be indicative of another problem with the Exchange store.

Warning: Use of this registry key will result in the successful status of job operations that otherwise would have qualified as being failed operations. Ordinarily, successful job status indicates that 100% of the targeted data has been protected and recorded to media. After this registry key has been enabled, a successful job status will indicate a primarily successful backup operation with exceptions. When this key has been enabled, Symantec recommends that an inspection of job log files is performed to make note of any possible exceptions that may have occurred during a backup operation.


I. Creating the Registry key:

1. Run REGEDT32.EXE

Warning: Incorrect use of the Windows registry editor may prevent the operating system from functioning properly. Great care should be taken when making changes to a Windows registry. Registry modifications should only be carried-out by persons experienced in the use of the registry editor application. It is recommended that a complete backup of the registry and workstation be made prior to making any registry changes.

2. Highlight the following registry key:

HKEY_LOCAL_MACHINE\SOFTWARE\VERITAS\Backup Exec\Engine\Backup [For versions 9x and 10x]

HKEY_LOCAL_MACHINE\SOFTWARE\SYMANTEC\Backup Exec for Windows\Backup Exec\Engine\Backup [For versions 11x and 12x]


3. On the menu bar, select Edit | Add Value
4. In the Value name field, type in "Fail Jobs On Corrupt Files"
5. For the Data Type, select REG_DWORD (Figure 1)

Figure 1


6. When prompted for the Data, type in "0" (without the quotes)
7. Click OK
8. Close REGEDT32


II. Registry Key Already Exists:

If the key already exists, the following dialog (Figure 2) will be displayed.

Figure 2


In this case, the key must be modified. To modify the registry key:

1. Run REGEDT32.EXE

Warning: Incorrect use of the Windows registry editor may prevent the operating system from functioning properly. Great care should be taken when making changes to a Windows registry. Registry modifications should only be carried-out by persons experienced in the use of the registry editor application. It is recommended that a complete backup of the registry and workstation be made prior to making any registry changes.

2. Browse to the following key:

HKEY_LOCAL_MACHINE\SOFTWARE\VERITAS\Backup Exec\Engine\Backup [For versions 9x and 10x]

HKEY_LOCAL_MACHINE\SOFTWARE\SYMANTEC\Backup Exec for Windows\Backup Exec\Engine\Backup [For versions 11x and 12x]

3. In the right window, double-click Fail Jobs on Corrupt Files (Figure 3)

Figure 3


4. In the DWORD Editor dialog box change the Value Data to 0 (zero) (Figure 4)

Figure 4


5. Click OK

6. Exit Regedt32


Supplemental Material:

System: Ref.#Description
Error Code: 0xe000fe2d The backup of the item is bad
Error Code: 0xa000fe2d The backup of the item is bad
UMI: V-79-40960-65069 The backup of the item is bad


Products Applied:
Backup Exec for Windows Servers 10.0, 10d (10.1), 11d (11.0), 11d (11.0) 7170, 12.0, 12.5, 9.1, 9.1 4691

Last Updated: May 21 2009 08:05 PM GMT
Expires on: 05-21-2010
Subscribe Via E-Mail IconSubscribe to receive critical updates about this document

Subjects:
Backup Exec for Windows Servers
Application: Backup, How To
Application Basics: Troubleshoot
Priority: 10

Languages:
English (US)

Operating Systems:
Windows 2000

Advanced Server, Datacenter Server, Professional, Server

Windows NT

4.0 Server

Windows Server 2003

Enterprise Server, Enterprise ServerSP1, Standard Server, Standard Server SP1

Wednesday, September 16, 2009

Working recycle bin in windows 7 task bar

Place a Fully Functional Recycle Bin on your Windows 7 Taskbar

By Matthew DeCarlo on September 15, 2009
Editor: Jose Vilches

Write / Read user's feedback

I'm not exactly sure when it became cool to abandon the use of your operating system's desktop, but a growing number of people these days prefer the "clean" look. Recent releases of Microsoft Windows seem to encourage this. By default, Windows Vista and 7 strip the desktop of all icons but the Recycle Bin.

Try as you may, ignoring this lone icon is impossible. Sure, you can hide it in just a few seconds, but at the cost of losing quick access to deleted files. You could also drag the Recycle Bin icon to the taskbar, but then it will appear pinned under Windows Explorer -- requiring an extra click to open and offering half the functionality.

In this tip, we will show you one method of bringing a fully functional Recycle Bin to your Windows 7 Taskbar, so you can clear off your desktop

once and for all with little to no compromise.

To get started, we'll have to bring out the Quick Launch bar. Rest assured, it will not replace the new Windows 7 Superbar -- in fact you won't even know Quick Launch is there. Right click on the Windows 7 Taskbar, hover over Toolbars and click New toolbar.

When prompted to provide a folder directory, enter the following string of text: %userprofile%\AppData\Roaming\Microsoft\Internet Explorer\Quick Launch

After doing so, a labeled Quick Launch bar should appear near the clock. Odds are it will have several icons onboard, but since we won't be using this bar for anything apart from hosting the Recycle Bin I would just delete all of the shortcuts.

Right click on the Taskbar and uncheck Lock the taskbar if it isn't already. Now, right click on your Quick Launch bar and uncheck Show text, as well as Show title. Finally, right click and hover on View to select the size that your Recycle Bin icon will be -- I chose large to match my Superbar icons.

With the Quick Launch bar configured, all you have to do is drag and drop the Recycle Bin onto it. Feel free to grab the dotted lines and drag the Quick Launch bar to your preferred location. I would recommend either pulling it all the way to the left near the Start menu, or all the way right near the clock.

When you are satisfied with the position of your Quick Launch bar, relock the Taskbar and hide the Recycle Bin on your desktop by right-clicking an empty space and selecting Personalize, then clicking Change desktop icons in the left column of the Personalization window and un-checking the appropriate box.

Did you know?
Apple sued to prevent other software companies from offering graphical user interfaces similar to its own. The company lost most of its claims but courts agreed Apple's Trash icon was original and protected by copyright. Non-Apple software must use other metaphors for file deletion, such as Recycle Bin, Smart Eraser, or Shredder.

Tuesday, October 21, 2008

Customize the U3-CDROM to any ISO file you want

UNIVERSAL CUSTOMIZER 1.0.0.8 

This software will customize the U3-CDROM to any ISO file you want. 

WARNING: Please backup all data on your flash drive before running this software. It is recommended that you backup the U3 CD-ROM before running this software. To do this follow these directions. 

    1. Go to My Computer on the Desktop. 
    2. Right-Click where it says 'U3-CDROM' are something similar to that name. 
    3. Once the menu comes up click 'Open'. 
    4. Now simultaneously press 'CTRL' and the 'A' key on the keyboard. 
    5. Now simultaneously press 'CTRL' and the 'C' key on the keyboard. 
    6. Now go to your desktop and make a new folder (name it anything like U3BACKUP). 
    7. Go to your new folder. 
    8. Now simultaneously press 'CTRL' and the 'V' key on the keyboard. 
    9. Done.


HOW TO USE UNIVERSAL CUSTOMIZER 1.0.0.8 

    1. Download the software Universal Customizer 1.0.0.8
    2. Extract to the Desktop and execute Universal_Customizer. 
    3. Insert a U3 Drive into your PC. 
    4. Follow the on-screen instructions. 
    5. Done.


INFORMATION 
Updates: Changed the version variable to '*' so it should now customize all U3 Drives without a problem. 
New: Packaged the zip file with a command-line ISO maker. 

I scanned the files with Norton AntiVirus 2006. 

This computer application is not able to make a classic(normal) flash drive U3 compliant. 

The pre-packaged 'U3CUSTOM.ISO' file is the loader for the U3 SwitchBlade/Hacksaw. 

You might have to run this software 2 or more times before it works properly (you might get an error message) and manually put your files back on the flash drive and re-install your U3 software titles. 

To make your own 'U3CUSTOM.ISO' file follow these directions. (XP/NT/2003 Only) 

    1. Navigate to the directory where you extracted Universal_Customizer.zip to and open the 'U3CUSTOM' folder. 
    2. Copy your custom files* to that folder. 
    3. Go to the parent directory. 
    4. Execute 'ISOCreate.cmd' (It will create an ISO with the CD name of 'U3CDROM') 
    5. Launch 'Universal_Customizer' and your done.

*Use the files in the folder where you backed up your U3 CD-ROM if you want to restore your U3 LaunchPad. 

U3 FIRMWARE ISO's 
Memorex LaunchPad 
SanDisk LaunchPad 

How to use these ISO files 

    1. Download an ISO from one of the above links to the directory where you extracted UC 1.0.08 to in the 'BIN' folder. 
    2. Rename your current 'U3CUSTOM' file to 'U3CUSTOM.OLD' or something(just to keep that file). 
    3. Rename your newly downloaded ISO file to 'U3CUSTOM'. 
    4. Go to the parent directory and execute 'Universal_Customizer'. 
    5. Done.

Wednesday, October 15, 2008

Windows Repair Feature

One of the best kept secrets of Windows XP is it's built in repair feature!

In previous versions of Windows, correcting an operating system error, or installing a new motherboard, usually meant formating and reinstalling, resulting in loss of all data. 
Don't worry; Windows XP repair feature won't delete your data, installed programs, personal information, or settings. It just repairs the operating system!

Note: The system repair function will remove any updates you have previously installed that are not included on the CD. Drivers will also be reverted to their original XP versions, as well as some settings (network & performance settings may sometimes be reset to their defaults). It may be necessary to reactivate your Windows XP as well. When finished, you will have to download all of the updates from Microsoft Windows Update, because they are all replaced during repair.

Why would I want to reinstall Windows XP?
1) Can't start Windows XP in safe mode.
2) You have problems caused by a recently installed system update (Windows Update, hotfix, Windows XP service pack, or Microsoft Internet Explorer update).
3) Your problems can't be solved with system restore, or you can't access system restore.
4) You've installed a new motherboard, or made other major hardware changes and need to reinstall Windows.

Let's get started!

Step 1: Rule out hardware issues. Windows Repair will only fix software problems. Hardware issues can also cause boot problems (i.e. bad hard drive, memory, CPU, or power supply).

Step 2: Backup. It's always a good idea to backup your important data before making changes to Windows XP. Relax, if you follow these instructions your data will be perfectly safe.

Step 3: Boot from your Windows XP CD. Insert the Windows XP CD into your computer's CD-ROM or DVD-ROM drive, and then restart your computer. When the "Press any key to boot from CD" message appears on the screen, press a key to start your computer from the Windows XP CD. 
Can't boot from your CD? Please see the note at the bottom of this page (Configuring Your Computer to Boot from CD).

Step 4: A blue screen will appear and begin loading Windows XP Setup from the CD. 

Note: RAID/SCSI/Unsupported UDMA users:
You will be prompted to "press F6 to install any third party SCSI or RAID drivers". Most users will not have to press F6, but if you are running RAID, SCSI or unsupported UDMA controllers, then you will have to have your controller drivers on a floppy disk. 
If you are unsure whether you have RAID/SCSI, then simply let the CD load without pressing F6.

When completed loading files, you will be presented with the following "Windows Setup" screen, and your first option. Select "To set up Windows XP now, press ENTER". DO NOT select Recovery Console.


When presented with the screen below. press the F8 key to continue.


Next, Windows Setup will find existing Windows XP installations. You will be asked to repair an existing XP installation, or install a fresh copy of Windows XP. 

If no installations are found, then you will not be given the option to repair. This may happen if the data or partition on your drive is too corrupted.

Note: If you install a fresh copy, all data on that partition will be lost!


Your almost finished! Windows XP will appear to be installing itself for the first time, but it will retain all of your data and settings. Just follow the prompts, and have your CD-KEY ready if needed.

Do you have more than one system, or lost your CD-KEY? Visit 
the keyfinder page to retrieve your CD-KEY.

Update: Due to the proliferation of the Blaster and Welchia Worm/Virus be aware that a Repair Install will leave your system vulnerable. You can get infected within seconds. Do not go on line until you have enabled XP's firewall first.

Remember to run Windows Update! (install critical updates first) 

-----------------------------

Configuring Your Computer to Boot from CD

Many computers are not configured to boot from the CDROM. If you cannot boot from the CDROM, this is probably due to the boot order of your devices being incorrect. You can change this in the BIOS. 

You enter the BIOS from the first screen you see when you turn your computer on. To enter your BIOS, most users here will press the DEL key. 

Most Dell, Toshiba, Gateway, Sony & HP systems will press F2.

Compaq users will usually have to press F10.

IBM typically uses F1 or F2.

Other brands may have different keys to press to enter setup, F1, F2, Del, Tab and CTRL+S. If possible see the manual for your computer or motherboard. Also, the BIOS will usually display which button to press to "enter setup" during POST (if it flashes by too fast, press the Pause key).

When you enter the BIOS setup, you need to change the boot order. The CDROM should be setup before the Hard Drive. Each BIOS is different, but here is an example:


Note: If you need assistance with a repair installation, please start a new topic in our Windows XP Forum. This topic is also open for comments, but not all will receive a reply.

IMPORTANT NOTE: After running a repair, you may find that Windows Update refuses to install the most recent 80 patches. This is because the latest version of Windows Update is broken, and doesn't register some DLLs if they're previously been registered (as happens with a repair install). Here's a work around until they get it fixed:
  1. Stop the Automatic Updates service. To do this, follow these steps:
    1. Click Start, click Run, type cmd, and then click OK.
    2. At the command prompt, type the following commands, and then press ENTER after each command:
      net stop wuauserv
      exit

  2. Register the file that is used by Windows Update and Microsoft Update. To do this, follow these steps:
    1. Click Start, click Run, type cmd, and then click OK.
    2. At the command prompt, type the following command, press ENTER after the command, and then click OK when you receive a verification message:
      regsvr32 %windir%\system32\wups2.dll
      Note: for x64 machines regsvr32 %windir%\syswow64\wups2.dll

  3. Start the Automatic Updates service. To do this, follow these steps:
    1. Click Start, click Run, type cmd, and then click OK.
    2. At the command prompt, type the following commands, and then press ENTER after each command:
      net start wuauserv
      exit
New knowledge base article on this issue, and a post on the Microsoft Update Blog

This post has been edited by admin: Oct 2 2007, 09:38 AM

Posted Orignally by GeeksToGo.com

Tuesday, October 7, 2008

Recovering lost windows

Given the way I use Windows, I often run into situations where windows will end up off screen and I need to get them back where I can see them. This is usually because of the way I use my dual monitors and switch one between machines. Regardless, this technique will come in handy if you've not used it before.

1) Activate the window. This may take some guesswork if the window doesn't show up on your taskbar. Either click it on your task bar, or ALT-TAB until you think you've activated the one you want.

2) Press ALT+SPACE followed by m (for “Move“). This will move the mouse to the center of the title bar of the window. You could use the keyboard to move the window if you wanted to, but we'll use the mouse instead. If you can see the window on your taskbar, you can right-click and select “Move“ instead if you prefer.

3) Carefully, without moving the mouse, click down to grab the window and drag it back to your desktop. As long as the window isn't ridiculously far away (i.e., the application is buggy and has placed your window millions of pixels away from where your desktop is, you'll be all set. For me, I usually know right where my lost windows are (over to the left where my second monitor would normally display them), so I just drag over to the right and I'm set. 

Note: If you are unable to drag it with the mouse you may also use the arrow keys to move the window

If (3) isn't working for you, the window may be maximized. Press ALT+SPACE followed by r (for “Restore“). This will restore the window if it's maximized somewhere (another monitor perhaps). Then go to (2) and try again.

I hope this helps somebody.


Posted Aug 18 2004, 11:52 AM by keith-brown
Filed under: